Friday, October 30, 2009

I was lucky enough to discover this red lampshade on the clearance trolley for $3, normally I wouldn't go for red at all but I needed a new lampshade for the girls and as luck would have it I have a quilt in the processes of being created that will have lady bugs on it (at some point)
I was struggling with how to make it special and decided on stamping it with my roller stamp with navy ink to soften the brightness of the red (these photos don't do it justice as it is Tomato red)I than glued the yellow gathered ribbon around the bottom and rick rack top and bottom


I spent so much time trying to decide on how to decorate it with, I had buttons and ribbons in so many colours, but I am happy with the result and know it will look amazing with the new quilt.


Multipurpose Super Hero Capes (how to make them sound boring when they are so not!)

Super special capes are required for Miss Soon-to-be-Five's special day which I have heard will require all manner of Super Hero's to attend (shhh!) Just because I could, I picked up some cheap but awesome patterned velour and satin from Spotlight and made up these universal capes....should be able to use these as multiple costumes - super hero's, magician's, red riding hood - you name it the list is endless, let's not forget just normal play - how wonderful is it to wear something that feels soft and silky and that can twirl, fly and disguise as well :) I even took the time to give them little hand slots in case they wanted to be very elusive ;)

And just in case you are wondering, special instructions that won't self destruct will be going out in the form of mask cutouts that the superhero's can decorate themselves with a piece of magical cape ribbon that will transform any pillowcase, tablecloth or teatowel into a super hero cape!!!


Thursday, October 29, 2009

Purple Butterfly Shirred Dress

I made this very simple and gorgeous frilly dress and love that you don't need a pattern, just a tape measure to get the top part the correct size. I have never attempted shirring before and definately need to tweak my technique, but I could see this being the only thing I do! I just think I had the tension too tight and will muck around with that later.


All you need to do is cut up 6inch strips, or smaller if desired (I loved the smaller contrast fabric)and stitched up the lengths together (make sure you have about 6 lengths of each fabric...you may need more material for the bottom rows) , I overlocked the edges and worked out what size I needed for the top part and started shirring (approx 3 times the childs chest measurement)

With the remaining material, I stitched across one edge and had the tension set to gather it as I sewed so that cut out a lot of time. Each layer you attach the gathered side to the previous layer until you have reached the desired length, than sew up the back seam (inspired by this tutorial), hem the bottom edge and attach ribbons for the straps ensuring that you have sealed the ends of the ribbon with a lighter.

Embellish it as needed....

One very cute, simple, and very twirly dress!!!

Wednesday, October 28, 2009

I've been featured :)

I am so excited to find that Miss to-be-five's special denim dress has been featured today on 'Ruffles & Stuff'....so cute to see her smiling aussie face on an American blog..how very international :)

I have had an enormously busy weekend with magical capes (for Miss soon-to-be-Five's superhero birthday party in a weeks time), revamping a plain lampshade and whipping up a very cute twirling dress with my first attempt at shirring....

pictures coming....

Thursday, October 22, 2009

Refurbishing Kid's Sofas

From this........
To this.......

Just a bit of pulling apart involved and a staple gun :)

Sunday, October 18, 2009

Recycled Shirt - Gorgeous Dress :)


Day two of Daddy shirt make-overs.....I attempted Miss Six dress using Dad's unusable Polo Ralph Lauren business shirt. Let's just say that when I bought this shirt at DFO I bought it for the fabric, it was so smart and almost silken in texture, so although Dad never got to wear it due to the washing incident (now I know why they were on clearance) I am so grateful to have reused it for a much loved dress for Miss Six.

As mentioned on previous post that my inspiration came from here, and lets just say that it was the easiest dresses to put together, even with having to draw up the pattern via hand from a 2 x 2 inch photo - somehow the dimensions worked.

I did have to remove the pocket from one side and you can only vaguely see that there was one there, though I would assume after the first wash you may not even notice it.

I finished it off with a complimentary belt and a couple of attempts at fabric flowers with some funky floral fabric, which is usually not my style but I really liked the colours on this pattern. Note that the top flower is covering a hint of the wash disaster that snuck into the cutting zone, but just as well it was in that spot...almost like it was planned for a gorgeous flower!

One Old Favourite - One Happy Girl :)


After checking out Dana's fantastic pattern here for converting an old faithful shirt of Dad's into a funky little girls dress I was inspired to attempt refashioning myself i than went through Dad's hoard of shirts he never wears but can't give away and found a Roger David chambray shirt from many moons ago - I remember this shirt from our dating days :) just perfect for Miss Five-to-be

I thought I would attempt the pattern on the Chambrey shirt as a test, but the pattern is generally used on a pocket-less business shirt and when I attempted to remove one pocket the original prewashed colour showed......so my brain went into over drive and I envisioned a concept, cut quickly and started putting it together.....you could say it evolved as I sewed with inspiration coming every couple of stitches. At first it was going to be an overall style, than I discovered the special design on the back of the shirt and knew I needed to keep that, to tie it all in I reused the cuffs as the shoulder straps with buttons and buttonholes already prepared for me (gotta love that) than it was just a matter of prettying it up, a bit of rickrack to start and a bit of quilting fabric just waiting for this project....

As I sewed late into the night on all the beautification (that was the longest part, the main dress was incredibly simple to put together) I kept trying it on Miss Five-to-be, who struggled with the concept of a half finished dress with pins in it....."I will like it better when it is finished" - I love her honesty :) This morning as I lay in bed I was rewarded by her little voice whispering from the dining room where it hung - "I just love it, It's just what I thought it would be!!!" I love her gratitude :)


So even though it doesn't even begin to look like that pattern I originally started to do - I am so happy with the results and love that I didn't use a pattern at all....all my own creativity!!!

Tooth Fairy is finally coming - we are ready!


Miss Six has finally got her first wobbly tooth :) I was a late (7yrs) tooth loser so this is definately not out of character for our family....but as I came from a family that the tooth fairy never visited, I knew something extra special was in order for my children's first encounters with the tooth fairy!

Thursday, October 15, 2009

Fabrics......

I got sidetracked when purchasing elastic yesterday - but check out these gorgeous colour combinations.....lot of ideas......

Black, White and Red


Salmon Pink through to Sage Greens


Funky Aqua blue combos


Mid pinks to purple tones

Ruffled Jumpsuit


How cute has these ruffles turned out....I found this simple tuturial here, but altered the design slightly so that it curves around to a neat point on each side.

Such a simple gift for someone, though this time around I practised on my friend Gabby's preloved baby's clothes....what was a simple outfit is now very special :)


PS.....by the way I had an over abundance over strips of fabric from the Spring quilt, what a perfect way of using it up :)

It's all about the Tassle....


All the sewing has been completed on Felicity's spring quilt, it's been a busy couple of days with hubby away and a couple of long nights while I didn't have to work the following days......almost like a holiday LOL! So the quilt is finished and I have started to work on the tassling of the border - here's a photo to show my technique...this is rather theraputic as you pull each horizontal thread out until you reach the base border sewing....

Father's Day Gift


Ok so it's not crafty at all, but I really am creatively inspired by this...I decided to purchase these little Willow Tree figurines for Father's Day as true depiction of my hubby and my 2 daughters bonding with our pet cat....They are actually two figurines, Father & Daughter and Compassion (I think) depicting my youngest who is always holding / torturing our pet cat Baxter with an abundance of love :) I love the way they sit together like they were meant to be! I hope that this inspires others as much as me to always remember the sweetness of children and those bonding moments ;)

Monday, October 12, 2009

The Idea Room: Visor Beanie with Flower Crochet Hat

The Idea Room: Visor Beanie with Flower Crochet Hat

Hot & Bothered :)


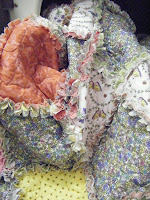
I sewed a quick seam around the very edge of the last border before throwing the quilt into the washing machine to soften and age the raw edges. This enables you to maintain a neat edge for the tassled border.


You know your in love with the colours of a quilt when you can sit there and watch it evolve, spinning in the washing machine, and I'm grateful it survived the ultimate test for any form of sewing.....the dryer test - yes all seams held and in place and when you opened the dryer the most amazing quilt greeted you....check out those gorgeous fluffy edges!

Hot & Bothered :)

I sewed a quick seam around the very edge of the last border before throwing the quilt into the washing machine to soften and age the raw edges. This enables you to maintain a neat edge for the tassled border.
You know your in love with the colours of a quilt when you can sit there and watch it evolve, spinning in the washing machine, and I'm grateful it survived the ultimate test for any form of sewing.....the dryer test - yes all seams held and in place and when you opened the dryer the most amazing quilt greeted you....check out those gorgeous fluffy edges!
And now for the tassled edge.....

Sweet and Innocent.....


I have finally got the borders attached, and can start to see it coming to it's finale...last border still to come though I needed to wash it first as the border that will be tassled works better unscathed...looking all sweet and innocent at this point :P

Sunday, October 11, 2009

Personal Touch........almost there :)


Another little sneak peak......I'm almost there - I have finished the machine quilting on the last panel of borders, including Felicity's name for her personal quilt...nice to know it's always going to be there :) I am hoping to have it completed today!

LinkWithin

Related Posts with Thumbnails

Contact Me